I want a nice device that can sit on my desk and control what I’m playing through plexamp and moode audio on all my connected audio systems. I also want to be able to move this device around with me because I have devices in different rooms. A cheap tablet like a Fire HD on a classy stand would probably do the trick, but I don’t have one of those lying around (and they don’t ship to my country) and what if I wanted to install more substantial software on the device to do… THINGS! Raspberry Pi to the rescue.
The Plan
I have a raspberry pi, touchscreen and some other bits and bobs that I think I can cobble together to make a touch screen device to basically show the web pages for plexamp and moode audio and with that I have a “Now Playing” display as well as the ability to control what is being cast to any of my pi streamers.
a short USB-A to Micro-USB cable to connect the battery hat to the display for power
4 M2.5 standoffs and screws for mounting (I didn’t measure the length before I closed everything up I’m afraid)
LiPo Battery Hat
This is a cool little hat I found on Aliexpress with a decently sized battery for not much money. It supports USB-C fast charging and can deliver power via the GPIO pins and USB-A output port.
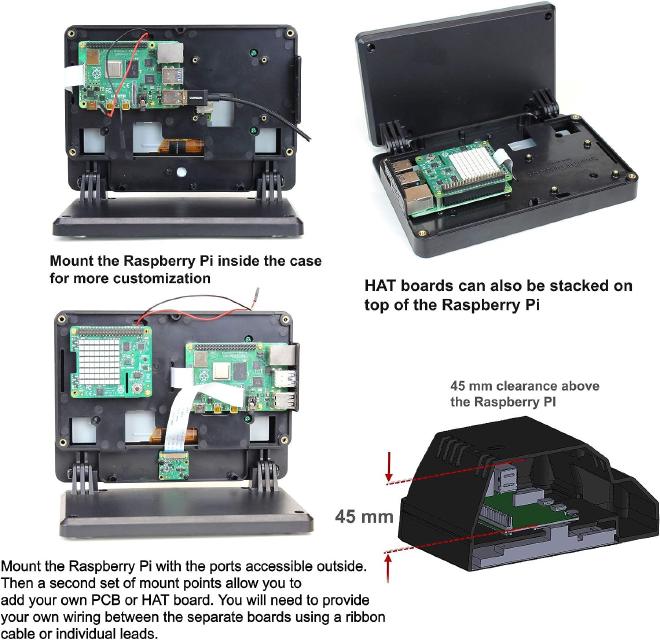
Smartpi Touch Pro Case
This case is pretty well made, has a ton of space to hold the raspberry pi and multiple hats, supports a fan and a camera if you want too.
The Build
Use the raspberry pi imager to put 64-bit raspbian onto the SD card and slot it into the pi. Once the pi is mounted in the case, you won’t have access to the SD card slot to do it later. Ask me how I know.
Plug in the battery to the lipo hat and turn it off by double clicking the standby button
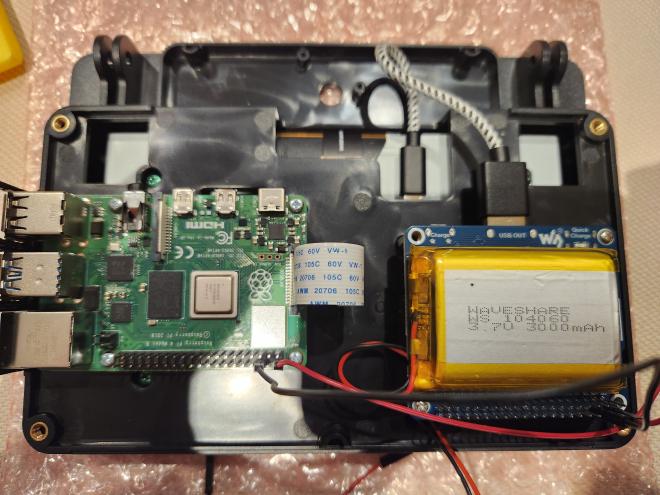
Assemble the pi and hat into the case following the very good instructionsHere’s what it should look like before you connect the fan and close up the back. Notice the short micro-USB cable connecting the lipo hat to the screen. Because of this, I used the GPIO pins to power the pi itself (The red and black wires)
Turn on the lipo hat before closing up the back and check you can boot into a desktop
Configuring the OS for Quality of Life
Out of the box, using Raspbian OS with a touch screen is a pain because there’s no on screen keyboard and the touch display does not support all mouse actions through a touch interface. I used the instructions here to “Install a Virtual Keyboard” and “Right-Click”.
The screen kept going to sleep, which is bad for a display I want always on to show what’s playing. I disabled this by following these instructions
After running a battery test I got about an hour and a half out of this setup with the screen at full brightness and constantly on. This was ok, but nowhere near the run-time I wanted. I lowered the screen brightness by running
sudo sh -c "echo 50 > /sys/class/backlight/10-0045/brightness"
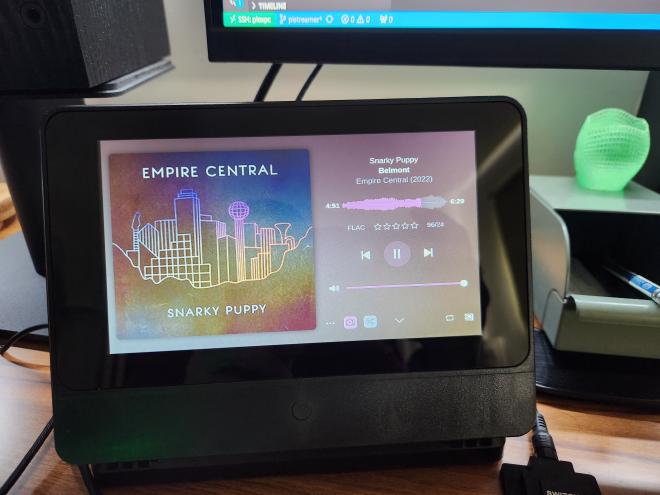
I haven’t re-run the test yet because there’s some things I might be changing.
Here’s the result:
The Issues
The major issue I have with the hardware setup is that every time I plug in, or unplug, the USB-C cable for charging, the pi reboots. I believe the hat cuts the power to the GPIO pins when it detects a change in charging states. I need to experiment further to see if there is a fix. I suspect that if I seat the hat on the pi, taking up all the GPIO pins, it might resolve this.
I suspect battery life will still be too short, even with lowered screen brightness. I may be asking too much of 3000mah.
Raspbian OS is a pain to use with the touch screen. It’s fine for the plexamp and moode audio interfaces over the web but if I install software locally, I think I’m going to get frustrated with it all.
Should You Build One?
Probably not.
It was a fun little project but ultimately, as I mentioned at the beginning, a tablet and stand gets you to the same place with better battery life and easier to use touch interface.
Where this may be useful is for people without an existing DAC in their audio setup. If you replace the lipo hat with a DAC hat and make this a permanent part of your audio stack, I think you would find it much more usable.